
Christmas is upon us, and it’s time to deck the halls and the walls with pretty décor. For many of us, that means breaking out the decorations from Christmases past and blowing the dust off before we set them out. However, for some of us starting from scratch with limited funds, that means we have to get creative and handy when it comes to decorating for the holidays.
Since funds are limited and I have a boatload of craft paper in storage, I decided to get creative and make these polka dot Christmas trees to jazz up our new house this year.
The inspiration for these trees came from Pinterest, of course. I saw them as I was scrolling the app one day and thought to myself, “Hmm…that should be easy to recreate. ”
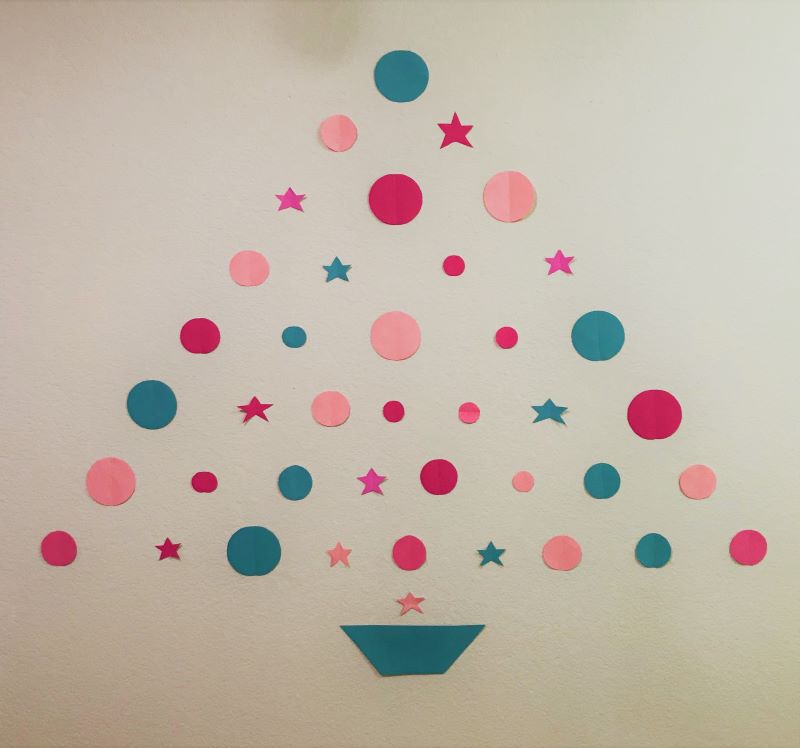
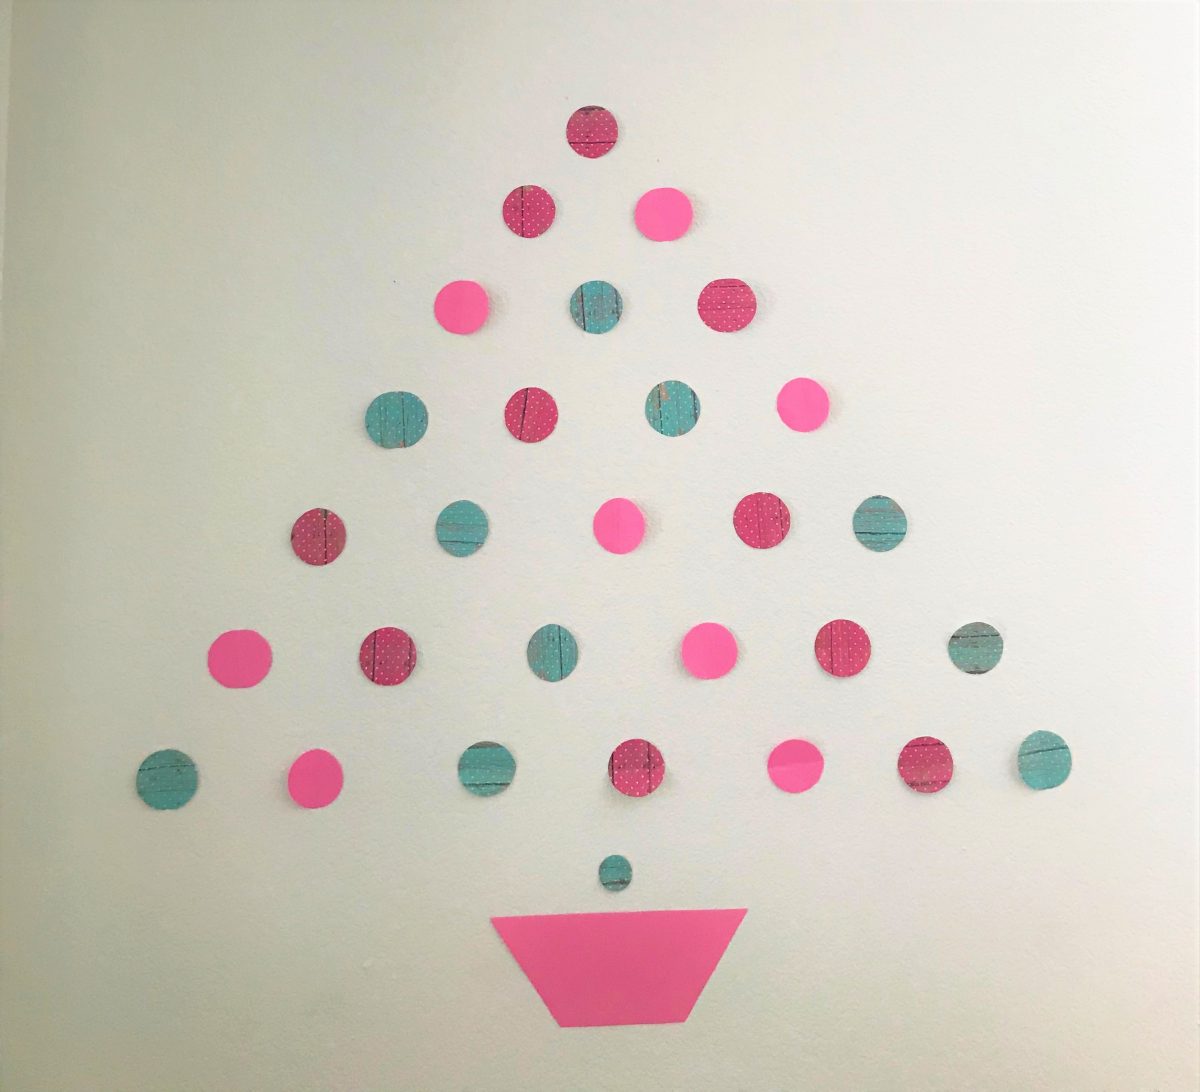
So, I went rummaging through my scrapbook boxes and found some cardstock paper that matched the colors of the tabletop trees we had placed around the house. I decided to design three different trees to adorn the walls of the living room area.
When I started my project at around ten in the morning, I thought it would be a fast process. However, I soon learned that cutting out 96 circles and shapes by hand actually takes a bit of time when you choose to do it all by yourself. In reality, it took me approximately five hours to cut out each circle and star and place them on the walls. Oh well, you live, and you learn. The process was therapeutic, if nothing else.
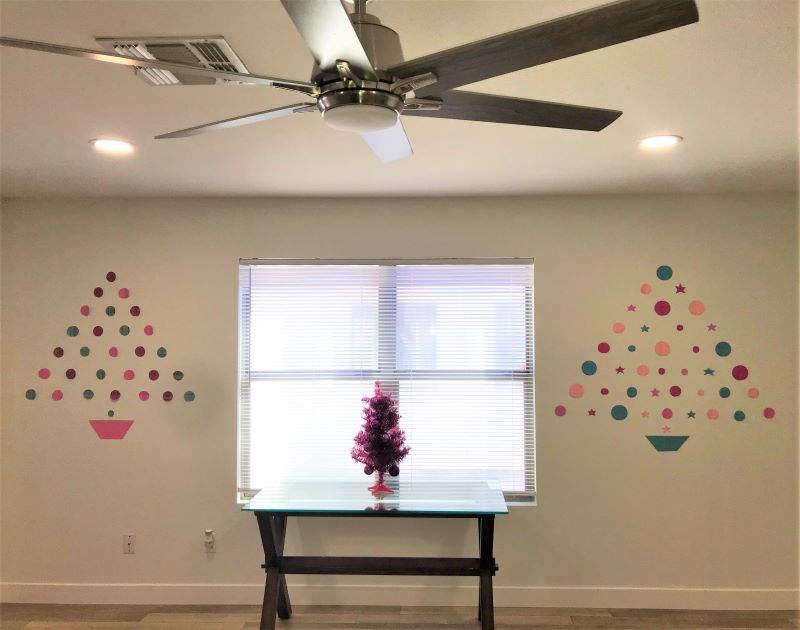
In the end, I have three lovely trees adorning my walls. They liven up the room and give us something festive to look at during the holiday season. Plus, they were absolutely FREE. The only thing they cost me was time and effort.
If you are looking for a fun and cheap way to decorate for the holidays, this is a great way to do it. It’s also a great activity to do with the kids and as a family.
Take a look at the steps below to create your own polka dot Christmas tree wall decorations. It’s as easy as 1-2-3.
Supplies (For 1 tree)
- 9 Sheets of craft paper or card stock – Any color or design that you desire. You may need more. It depends on the size of your circles.
- Pencil or marker
- Scissors
- Wall safe tape or mounting putty
- A circular object or stencil to draw each circles
Directions
- Draw your circles on your card stock or craft paper (you can also create a template of circles using PowerPoint and print them out on your card stock directly if the paper is 8.5 x 11 and fits into your printer).
- Cut out 28 circles. They can be the same size or different sizes. The choice is yours. It all depends on your design.
- Cut out a rectangular shape for the bottom of your tree. This will represent the tree stand so to speak.
- Layout your tree pattern on the table or floor before you place it on the wall. This way, you know exactly where to place your circles on the wall ahead of time.
- Use tape or putty to place your design on the wall. This step should go quickly if you laid out your pattern beforehand. Make sure it looks straight.
- Step back and admire your work.
Hopefully, this simple craft idea inspires you to create and decorate. Happy Holidays!


